At this point you should have your screen burned and ready for printing and your clamps are set up on a stable work place next up will be taping up your screen to prepare it for ink and inserting it into your clamps.
Take your roll of tape and scissors and cut a piece approximately the size of the inside of your screen mesh side down. With tape in hand stretch your tape so it begins to curl and create a 90 degree angle at this point you want to lay your tape down with ½ on the mesh and the other on the aluminum frame. This creates a seal between the ink and frame and prevents any ink form seep out and onto your work space.
You are now ready to insert your screen into the clamps. Make sure that your clamps are super tight and your screen is unable to shift. If you’re worried about damaging your screen with the clamps you can take a small piece of cardboard and sandwich it between the upper clamp and your frame. With your screen securely in the clamps take your stir stick and tape it onto your work surface directly below the free end of your screen. This will give you the offset needed for you to get a clean print.
With your screen Taped and secured in your clamps you can now take your print material and your art work and register it to your screen. To do this take your original art work and tape it down onto a piece of whatever material you choose to print on. Lay your material with your artwork now taped to it and place directly below your screen. With the screen down slowly move it back and forth until the artwork lines up directly with the image above.
Your print is now registered. Lift your screen but do not move your print material! This is where those expired gift cards come into play, take a strip of tape and lay it over the entire card leave one long end uncovered. Take your card line it up the corner of your print material tape down. Do this for the other corner so you create a 90 degree angle. You may now remove your artwork.
Your screen is now ready to be inked. I prefer using Versatex screen printing inks. They are a water based ink which allows them to air dry without any heat curing and can be made wash fast by using a fixer. Traditional water base inks require you to heat set textiles prior to washing. Take your ink and lay a generous bead of ink extending the full length of your art work.
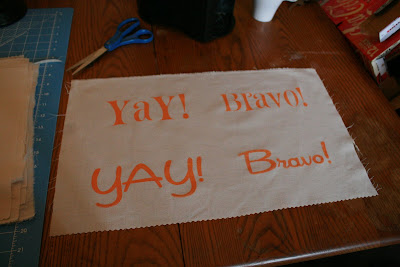
You are now ready to start printing! Take your with both hand squeegee and place it directly behind the bead of ink you laid down at a 45 degree angle. With slight even pressure slide your squeegee down your screen, stop once you’ve reached the end of your print.
With the squeegee in the same position slide your squeegee back to its original position. You’ve just made your first print!
Lift your screen and take a peak but do not move it your print. If you notice that your print is a bit blotchy lay the screen down and run your squeegee over it a second time. Since you did not shift the print below you should have no registration problems.
Repeat these steps until your done with all your prints admire at the sea of drying prints that now surround you! For cleanup you may use a natural bristle brush and mild dish soap. Spray the screen with a water house and gently scrub until all your ink has been washed out. If you notice some staining on your mesh don’t fret some inks will stain your mesh but as long as you are able to see through the mesh while it is held up to the light your screen should be fine to use again.
Want more? Up stay tuned for the final installment of the series which will include helpful hints, resources and a cost breakdown!


No comments:
Post a Comment