Today is day one of my crash course in traditional screen printing! This series of post is for all the brides/crafters out there that have ever considered investing in a Gocco or YUDU but could never justify the cost. Traditional screen printing may seem intimidating but with a few tools you’ll be able to produce prints similar to if not better in quality to those produced on a Gocco or YUDU system. Oh and the cost is about a 3rd of that associated with a YUDU!
For starters please don’t be intimidated by the list of tools below. All of the tools listed can be purchased online or through your local art or screen print supply shop and none with the exception of the laser printer are over 25 bucks.
The Tools-
· Hinge Clamps
· Aluminum or wood screen burned with your image
· Squeegee large enough to fully cover your art work
· Water based ink
· Tape
· Pallet adhesive/ temporary spray adhesive
· Ink Fixer (for textiles)
· Scissors*
· Transparencies/ velum*
· Opaque black marker*
· Laser Printer/Copier
· Paint stir stick*
· Voided gift card (random I know I’ll explain!)*
*not pictured
The first step in creating your art work you can either choose to hand draw your art work onto your transparencies/velum using an opaque black marker deco paint pens work best or printing it directly onto your velum or transparencies using a laser printer. It’s really important that you print your art work using a laser printer and not an Ink Jet printer. Inkjets do not produce the opacity need in your art work to achieve a clean burn. Our art work pictured below is printed on a tabloid sized velum paper, personally I prefer to use velum at about 50 cents a sheet its more economical that transparencies and is available in tabloid size for larger prints.
With your art work is ready it’s time to head down to your local art or screen supply store to buy your screen and have it burned. If you’re in the LA area I strongly recommend you check out Screen Depot on Main Street in downtown they caterer to the industry but have great prices and their screens are always perfectly burned. The cost of burning your screen generally depends on the amount of art pieces being burned on one screen and the size of your screen and can range from 10-15 bucks depending on the shop you go to. This may seem like a steep price to pay for 1 screen but remember when compared to gocco and YUDU screens that have a high margin of error it’s a pretty small price to pay for a perfectly burned screen.
When picking out a screen the 2 most important things to consider are screen size and mesh count. Mesh count is just a fancy way to refer to how many strings per inch are present on your screen mesh the higher the count the less ink is allowed to pass through your screen and the finer the detail you can achieve in your prints. Your screen size is dependent on the size of art work you plan to work with you want to make sure that any screen you purchase has at least 1 inch of space of clearance on all 4 sides of your art work. Typically we stick to a 17x21 125 mesh screen it’s a nice in between mesh count that allows for fine work but allows me to use thicker more opaque ink, a screen this size will typically cost about 18 bucks and can be reused many many times.
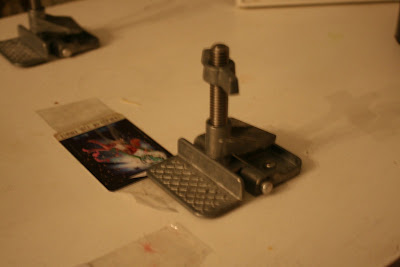
Next up is setting up your print station, for this you will need a pair of Hinge Clamps. Hinge clamps are the piece of equipment that allows you to raise and lower your screen without losing registration on your print and cost anywhere from 20-25 bucks. Now it is possible to pull a print without the use of hinge clamps but the process can get messy and has a higher margin of error so it’s advisable that you invest in some clamps. Your clamps will need to attached to a work bench or table if your unwilling to permanently screw in your clamps to a solid piece of furniture you can also use a large piece of plywood of MDF as long as its stable and roughly the same size as the screen you plan to use.
With your screen burned and your clamps installed you’re ready to start printing! Tomorrow I’ll go over how to prep your screen for printing, what inks to use and the proper way to use a squeegee!


No comments:
Post a Comment